If you’re maintaining your own website it’s important to know how to optimise images. Uploading large files onto your website can drastically increase your website’s load time which hinders your users’ experience and can have a negative effect on your search position, as Google uses page load time as a ranking factor in their algorithm. In this post we’ll show you how to edit and optimise images for your website to make sure they load quickly whilst remaining sharp and high quality.
Image dimensions and formats
Images you upload to your website should ideally be kept under 150KB so they load quickly even for users with slower internet connections. There are a few cases where larger images can be used on a website eg. photographers may sometimes sacrifice some page load speed for better quality images to ensure that their work is well represented, but most of the time this should be avoided.
Image dimensions
Most popular screen sizes are maximum 1920px wide so you needn’t use images with a higher resolution than this even if the images are being displayed full screen. Photos taken on smartphones or digital cameras will often have a very high resolution over 4000px wide. Images of this size should be scaled down to a lower resolution to reduce the file size.
Image formats
JPEG is the most common and recommended file format for images used on the internet. JPEG images can be considerably optimised, offering sharp images with a small file size. JPEG is a lossy image format meaning that while optimising some of the data is permanently deleted from the original file in order to reduce its size, this process is irreversible. The biggest advantage of lossy image formats is a significantly smaller file size (compared to lossless image formats) at a cost of quality loss.
On the other hand PNG is a lossless file format allowing the file size to be compressed without any quality loss, these files can also be decompressed to its original quality. PNGs support image transparency and offer higher quality than JPEGs at a cost of bigger file size and are best suited for logos and simple icons where sharpness is a definitive requirement.
Image optimisation
Optimising images using TinyPNG.com
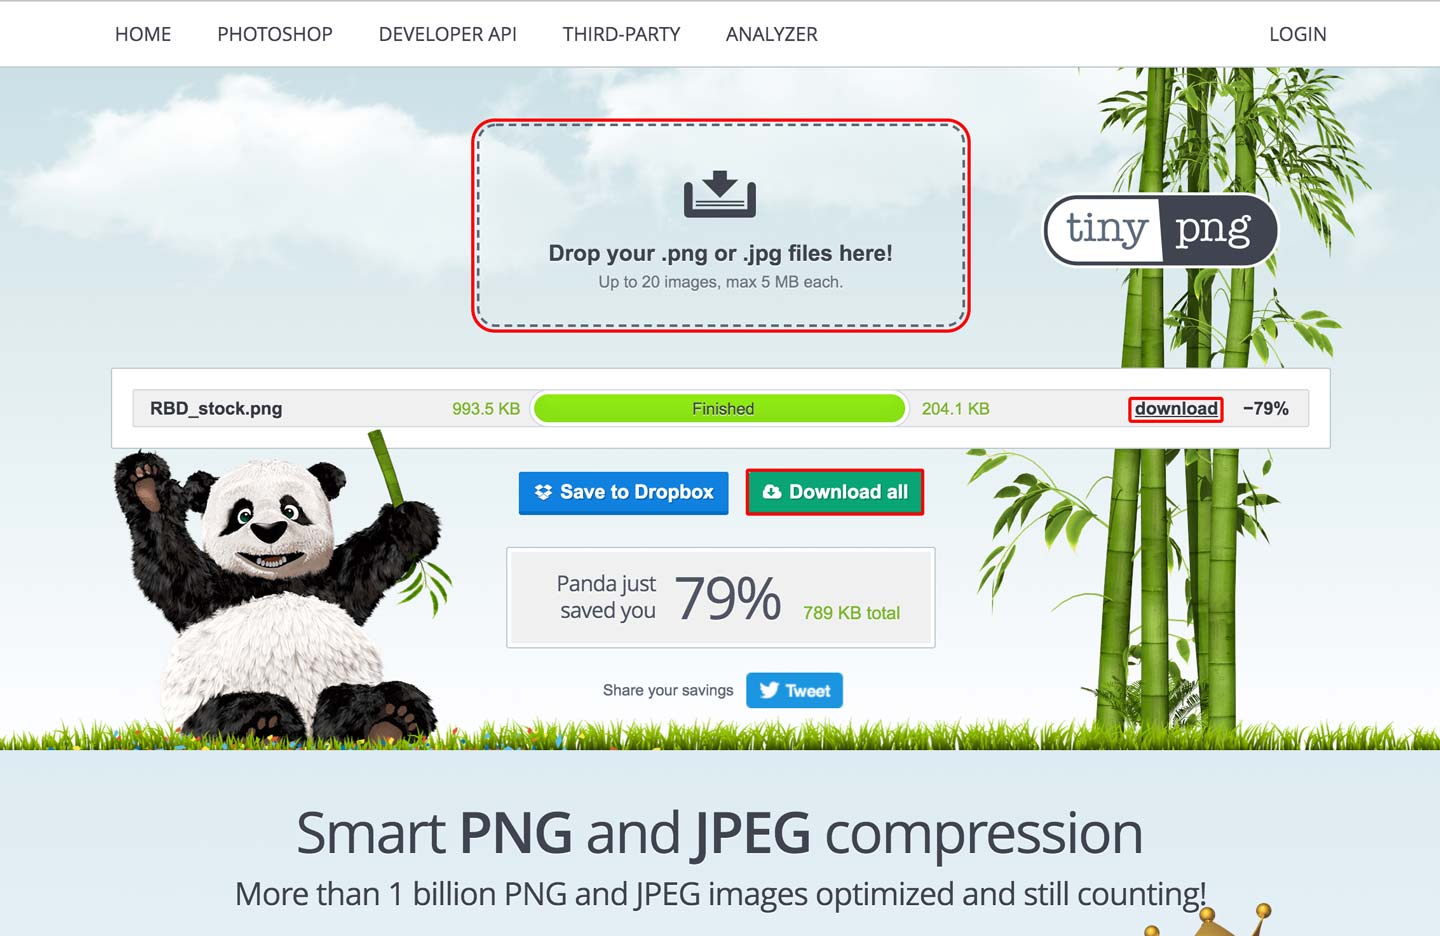
TinyPNG is a simple and easy to use, free online image optimisation tool for PNG and JPEG files that allows you to optimise up to 20 files at once.
Although this tool is perfect for PNG and JPEG files optimisation, it lacks the option to resize your image. If your picture was taken using a smartphone or a professional camera you’ll need to resize the image prior to optimisation.
To optimise your image simply drag and drop the image into the highlighted area, once the image is uploaded you’ll be able to download the optimised file by clicking ‘download’ to download a single image or ‘Download All’ when optimising images in bulk.
Optimising images using Adobe Photoshop
Photoshop is a robust software for image editing that also offers great image optimisation tools.
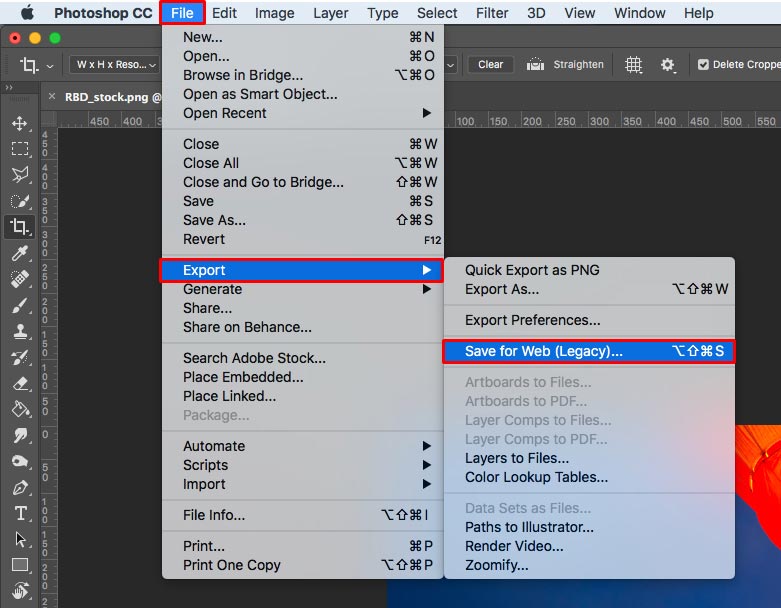
To optimise your image, firstly open the file in Photoshop and go to: File > Export > Save for Web to open the optimisation window.
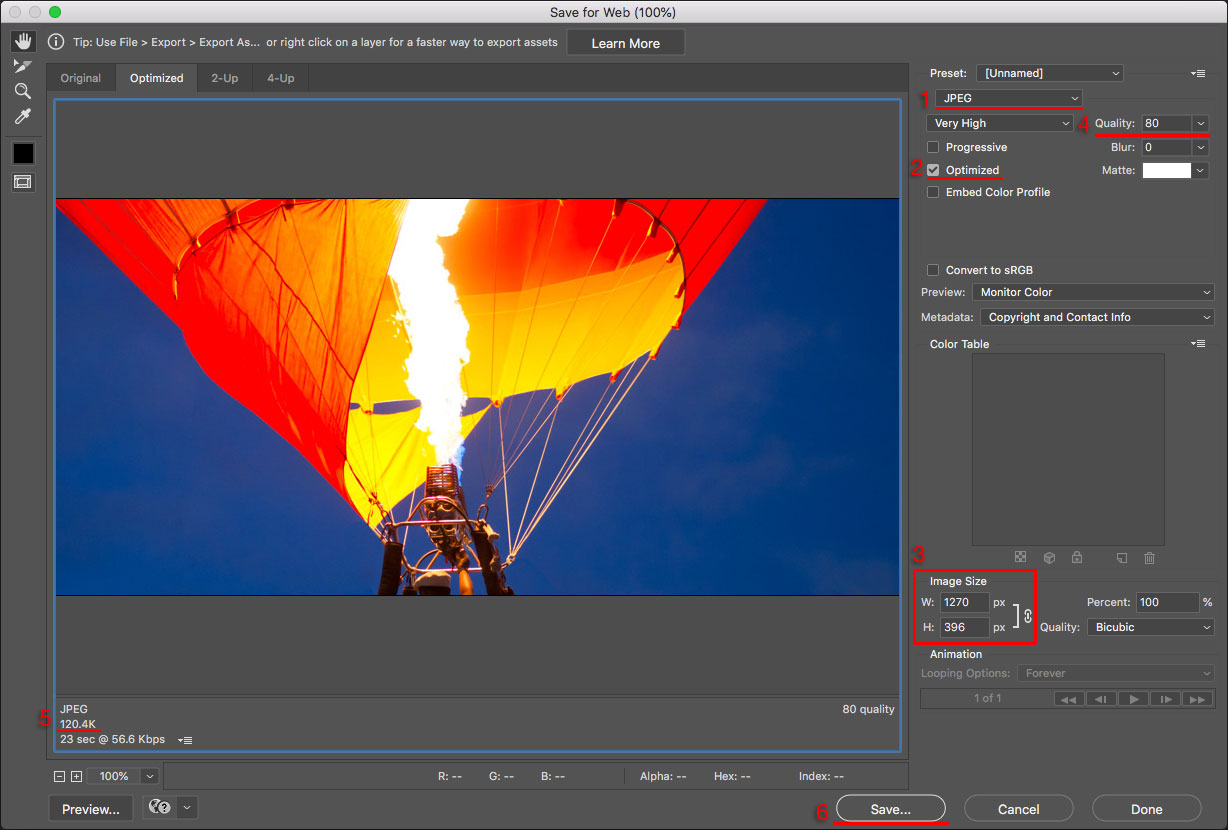
This window allows you to adjust the following options:
- 1. File format: JPEGs are the standard file format for web use. If you are exporting an image with a transparent background you should use the PNG file format.
- 2. Optimisation: Make sure that this checkbox is selected to reduce the file size of the image.
- 3. Resizing: This allows you to resize your image to the desired resolution prior to exporting.
- 4. Quality: When optimising a JPEG file this field allows you to change the quality of the image choosing values between 0-100. Lowering this value will reduce the file size at the cost of the quality of the image. Keep an eye out for any image distortion in the preview window before exporting.
- 5. Expected file size: This indicates file size of the optimised image, try to keep your images under 150KB.
- 6. When you’re done adjusting your image, simply click ‘Save…’ in the bottom-right corner, select the name of the file and location and save the image.
Keep an eye out for any image distortion in the preview window. Make sure that the images come out looking sharp and professional.

Quality: 10 - 12kb

Quality: 70 - 73kb
Optimising images using GIMP
GIMP is a free image manipulation software that serves as a great alternative to Photoshop.
Click the following link to download the latest version of GIMP from their official website: https://www.gimp.org/downloads/
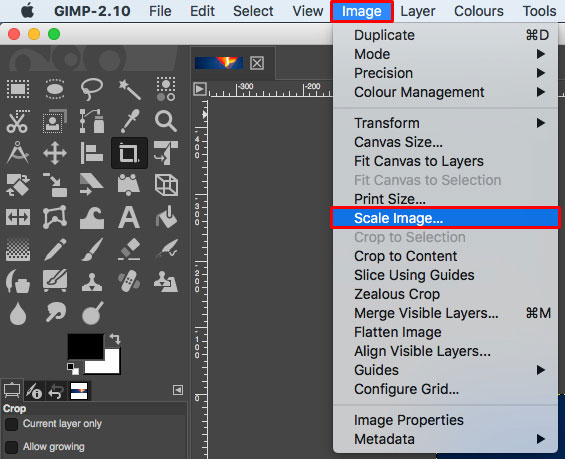
Once you open the image you want to optimise, you’ll need to resize it by going to Image > Scale image.
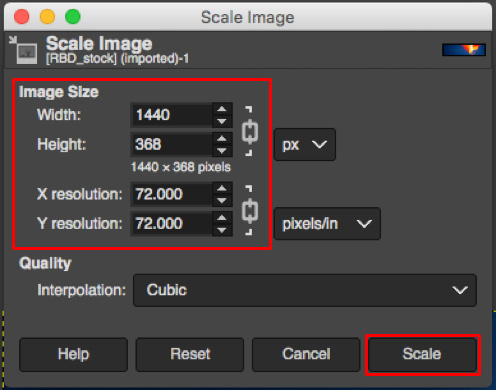
Set the desired Width of the image (eg. 1440px) and ensure the resolution is set to 72.000 pixels/inch. Image resolution is important as screens can display images in a maximum of 72ppi, setting it to anything higher will result in a bigger file size without improving the quality of the image. Finally, click ‘Scale’ to apply the changes.
Once your image is resized, go to File > Export as… to optimise your image.
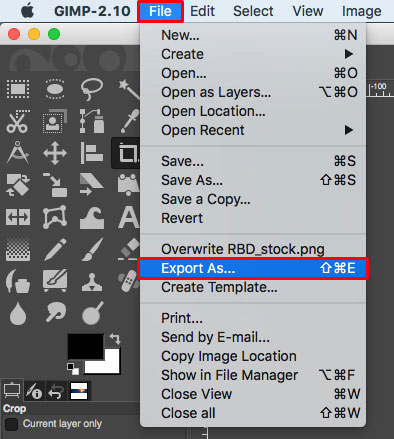
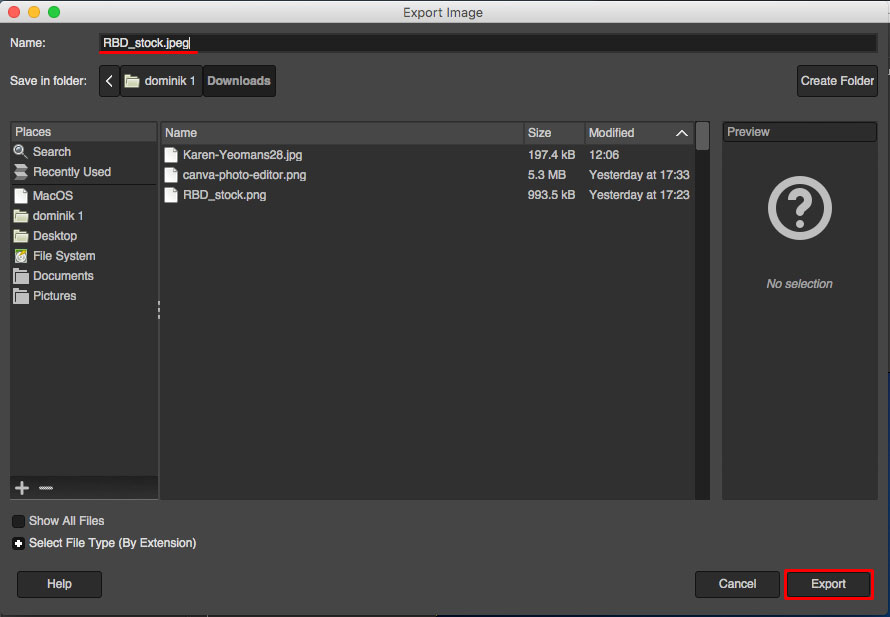
In the next window set the name of the file ensure to add the file extension at the end eg. RBD_stock.jpeg and click on Export.
This will bring out another window that allows to adjust the quality of the image.
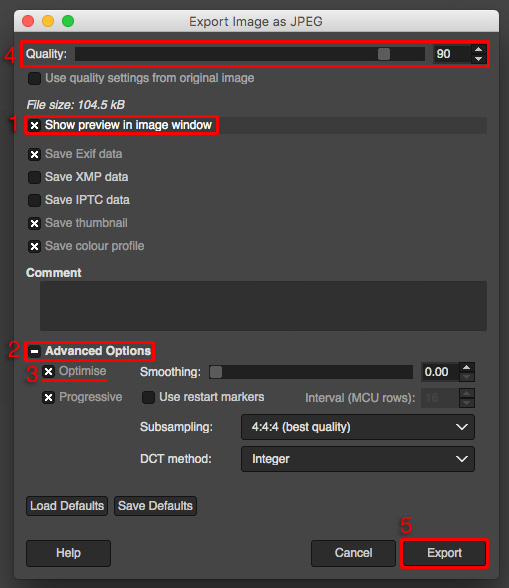
- 1. Select ‘Show preview in image window’ to enable the preview of the optimised image and display the estimated file size.
- 2. Click on ‘Advanced options’.
- 3. Ensure that the ‘Optimise’ checkbox is selected.
- 4. Now you can use the ‘Quality’ slider at the top of the menu to set the quality of the image. Adjust it to the point where your image file is as small as possible whilst remaining sharp.
- 5. Lastly click ‘Export’ to save the optimised image.
Keep an eye out for any image distortion in the preview window. Make sure that the images come out looking sharp and professional.

Quality: 10 - 18kb

Quality: 70 - 83kb
Wrapping up
It is important to remember that not all of your users will have fast internet connections, so optimising your images will ensure that your website is better liked by the search engines, loads faster for your users and overall performs better.
Get in touch with us to see how we can help you improve your website’s performance!